What's new

50" light bars and camper canopy wind fairing

Saw this earlier and am slowly working through fabrication of a similar bracket using the clear lens version of this same Heretic light bar. Initially thought about using the Baja Designs version to match my pillar lights, but this one is much thinner and allows the clearances I wanted. As soon as it's done, I'll post some pics.
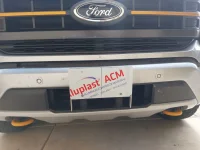
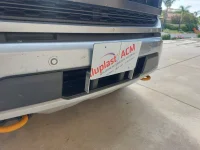
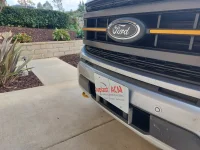
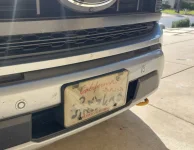
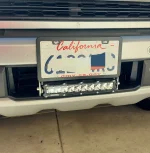
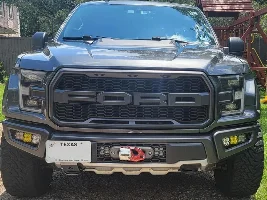
Finally made a little progress on this one. A couple photos showing the new bracket as it comes together and one of the factory bracket for comparison. The new one is some aluminum channel with matching mounting grooves cut in for the plastic pillars and "ears" folded down for the actual light bar mount. The license plate backing is a double sided aluminum composite for weight and strength. Eventually those will be bonded together (just screwed in place for the moment). Now for the all important, "But how does it actually mount?" question. I wasn't about to trust just the plastic insert even though the light bar is very light. I fabricated a step bracket, think "L" shaped with steps, that actually hooks over the bumper itself and effectively clamps the plastic in between. While I wouldn't want to hit a rock with it, I fully trust it for my typically off road and desert activities. I did drill one hole in each plastic pillar for alignment, but as intended those are easily covered with the factory bracket, should the need ever come up.

The next step will be getting the light bar so I can drill the mounting holes in the brackets ears and trim them to the final length. Then some sanding, bonding, sanding, painting and finishing with the goal being a dark grey textured look that mimics the factory plastic.
Finally bolt it on and wire it up.

Right now the delay is Heretic's suppliers, like everyone's are slow with some critical materials, but it should only be a few weeks to finish things up.
 

Attachments

  • 20221011_144156.webp
    20221011_144156.webp
    129 KB · Views: 145
  • 20221011_144204.webp
    20221011_144204.webp
    199.3 KB · Views: 136
  • 20221011_144215.webp
    20221011_144215.webp
    287 KB · Views: 132
  • Factory Bracket.webp
    Factory Bracket.webp
    184 KB · Views: 143
It won't fit on my truck because I'm cheap. 😉
As I was working on my much less expensive setup today, I was looking in the grill and aside from me being too cheap, I bet this solution would work absolutely awesome. With the wider open gap in the Tremor grill, these could be mounted a couple vanes up and would have unobstructed visibility.... So whose going to do it???!?!?!?! :p
 
As I was working on my much less expensive setup today, I was looking in the grill and aside from me being too cheap, I bet this solution would work absolutely awesome. With the wider open gap in the Tremor grill, these could be mounted a couple vanes up and would have unobstructed visibility.... So whose going to do it???!?!?!?! :p
let me finish my honeycomb front grill before I replace it
 
Finally made a little progress on this one. A couple photos showing the new bracket as it comes together and one of the factory bracket for comparison. The new one is some aluminum channel with matching mounting grooves cut in for the plastic pillars and "ears" folded down for the actual light bar mount. The license plate backing is a double sided aluminum composite for weight and strength. Eventually those will be bonded together (just screwed in place for the moment). Now for the all important, "But how does it actually mount?" question. I wasn't about to trust just the plastic insert even though the light bar is very light. I fabricated a step bracket, think "L" shaped with steps, that actually hooks over the bumper itself and effectively clamps the plastic in between. While I wouldn't want to hit a rock with it, I fully trust it for my typically off road and desert activities. I did drill one hole in each plastic pillar for alignment, but as intended those are easily covered with the factory bracket, should the need ever come up.

The next step will be getting the light bar so I can drill the mounting holes in the brackets ears and trim them to the final length. Then some sanding, bonding, sanding, painting and finishing with the goal being a dark grey textured look that mimics the factory plastic.
Finally bolt it on and wire it up.

Right now the delay is Heretic's suppliers, like everyone's are slow with some critical materials, but it should only be a few weeks to finish things up.
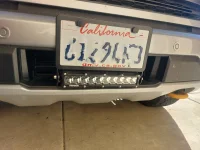
Final test fit before paint and wiring... coming together nicely!
 

Attachments

  • 20221024_112617.webp
    20221024_112617.webp
    188.6 KB · Views: 96
Final test fit before paint and wiring... coming together nicely!
Excellent choice of light👍
Very happy with mine as it's already dark around 6pm here in MN.
Last weekend camping they really came in handy up in the superior national forest.
 

Attachments

  • IMG_20220729_100518_Bokeh.webp
    IMG_20220729_100518_Bokeh.webp
    260.3 KB · Views: 132
Make the plate a flip-up and double up on those lights
Going to save up for the BD behind the grill setup. They're local so maybe, just maybe, I can convince them to use mine as the testbed and get a little discount for the Tremor version!
 
Just my thoughts...
After searching for months through forums and YT videos I chose to go with Heretic Studios.
They have both 40" and 50" options.
I grabbed a 10" amber lightbar for a license plate bracket and amber BA-2 for ditch lights and I'm very happy.
Lifetime warranty, 100% designed, manufactured and assembled in the U.S.A. Excellent customer service and fairly quick shipping.
IMHO they just look better than the rest as well and even though they don't have a backlight/DRL option, the amber matches the headlights and reflectors on the front really nicely as well as gives you a distinct different color while driving in snow and fog.
I should note that as far as I've seen none of their options are SAE rated for "on-road" use.

Thank you for this. As a first time truck owner, I wanted a front light bar but wasn’t too keen on drilling into the truck to install the longer ones. You made this look easy for rookies like myself to tackle. Thank you!
 
I found this one on Amazon. I’m not sure if it’ll work or not, but it’ll be here Monday.
ALAVENTE Universal License Plate Mount Bracket Heavy Duty Steel Front Plate Mounting Bracket Holder for 6" 7" 12" 17" 20" Led Light Bar Spot Lights for Car SUV 4x4 Jeep https://www.amazon.com/dp/B07MJ9G68H?tag=f150tremor-20
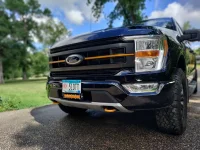
Here's the final version of mine after seeing @RedTailRay 's great idea. I took a little different approach and avoided the drilling aspect, but did have to do some fabrication so it clamps solid enough for some actual offroad adventures. Either way, I am really happy I saw his post as it was exactly what I wanted. Now wishing I knew about Heretic lights before I bought my BD ditch lights so I could have matching lights... since we all know that's important! (Anybody want to buy a pair of lightly used Baja Designs Squadron Sports driving combo, clear???? JK)
 

Attachments

  • LPlate_Light.webp
    LPlate_Light.webp
    208.5 KB · Views: 385
Here's the final version of mine after seeing @RedTailRay 's great idea. I took a little different approach and avoided the drilling aspect, but did have to do some fabrication so it clamps solid enough for some actual offroad adventures. Either way, I am really happy I saw his post as it was exactly what I wanted. Now wishing I knew about Heretic lights before I bought my BD ditch lights so I could have matching lights... since we all know that's important! (Anybody want to buy a pair of lightly used Baja Designs Squadron Sports driving combo, clear???? JK)
Looks great! I like this set up. What fabrications did you have to do? I don’t plan on taking mine on many off road adventures. Basically just into and out of the woods for hunting.
 
Looks great! I like this set up. What fabrications did you have to do? I don’t plan on taking mine on many off road adventures. Basically just into and out of the woods for hunting.
I used some 1"square aluminum channel for the primary bracket. Using the factory license plate bracket cut insets to match the profile of the plastic columns for tighter mounting. Next, removed material for mounting "ears" to fold down. In my case used a piece of lightweight aluminum panel (this AL sheeting bonded to a plastic core matched to the license plate size and bonded to the front of the bracket. This provided a really solid structure for the plate and light. The first iteration used a guide hole drilled in each column, but after some redesign, I have some bent AL plate brackets that fit behind those columns used for the factory bracket and up into the bumper so technically no holes would be needed. Bounced down a few washboard roads to make sure things were solid and no issues so far. I';; see if I can find some pics of the process.
 
Just my thoughts...
After searching for months through forums and YT videos I chose to go with Heretic Studios.
They have both 40" and 50" options.
I grabbed a 10" amber lightbar for a license plate bracket and amber BA-2 for ditch lights and I'm very happy.
Lifetime warranty, 100% designed, manufactured and assembled in the U.S.A. Excellent customer service and fairly quick shipping.
IMHO they just look better than the rest as well and even though they don't have a backlight/DRL option, the amber matches the headlights and reflectors on the front really nicely as well as gives you a distinct different color while driving in snow and fog.
I should note that as far as I've seen none of their options are SAE rated for "on-road" use.

@RedTailRay I’m finally getting my 10” Heretic lightbar installed this weekend. Hopefully.
In your video you said you didn’t use the relay, fuse, or switch…how did you dismantle the wire harness?
Did you cut the wire that connects to the lightbar from the relay and use just the one wire?
 
@RedTailRay I’m finally getting my 10” Heretic lightbar installed this weekend. Hopefully.
In your video you said you didn’t use the relay, fuse, or switch…how did you dismantle the wire harness?
Did you cut the wire that connects to the lightbar from the relay and use just the one wire?
You take the ground from the bar up to a good location near the battery and take the positive and connect it directly to one of the positive feeds from the upfitter switches. Those wires can be found under the battery. Those are the only connections you need. I used @RedTailRay’s idea as well and it was that easy wiring it up.
 
You take the ground from the bar up to a good location near the battery and take the positive and connect it directly to one of the positive feeds from the upfitter switches. Those wires can be found under the battery. Those are the only connections you need. I used @RedTailRay’s idea as well and it was that easy wiring it up.
Thank you! It seemed too easy. I found the upfitter wires today which were no treat to fish out. I’ll see how it goes this weekend!
 
You take the ground from the bar up to a good location near the battery and take the positive and connect it directly to one of the positive feeds from the upfitter switches. Those wires can be found under the battery. Those are the only connections you need. I used @RedTailRay’s idea as well and it was that easy wiring it up.
Worked like a charm so thank you again
 
Back
Top