What's new

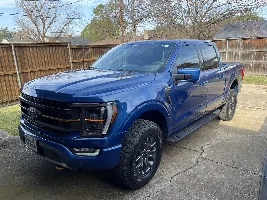
🛠️ What have you done to your F150 Tremor this week?

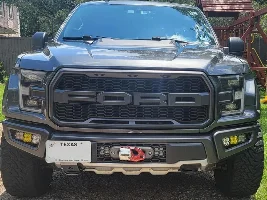
Installed the center console divider and the six Diode Dynamics SSC2 Pro pod lights behind the grille. Four white combo beam and two yellow fogs. My son and i made the wiring harness, all six amber backlights together (will go on Aux 1) white lights in Aux 2 and the fogs on Aux 3 is my plan. I hope to get it wired up tomorrow, I'll add some "action" shots when I get them.

I copied an idea I got on this forum for the mounting solution. Used some aluminum sheet I had laying around to fab it up, quite easy to do and seems very sturdy.

I'll see how much the grille blocks the light, I may cut that portion of grille out and move the lights forward a few inches... but I would rather not.
looks great!

i'd recommend putting the backlights on Aux 6(its a lower amp circuit and the backlights have a tiny current draw, no sense in consuming a higher amp circuit for the backlights)
 
IMG_6643.webp

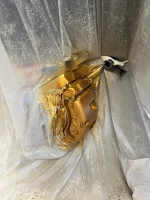
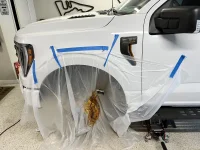
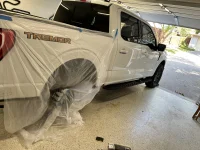
Painted the brake calipers with the tremor orange. If interested I can share pics of the process.
 
That looks awesome! what color did you use to match?
Used Fords Electric Spice H8. This paint matches the side gills and the badge. For some reason, the tow hooks are slightly different. Probably for durability since they’re tow hooks. But this paint looks pretty stock to everything else.

I used the 12oz spray can offered from the we site below.

 
looks great!

i'd recommend putting the backlights on Aux 6(its a lower amp circuit and the backlights have a tiny current draw, no sense in consuming a higher amp circuit for the backlights)
Thank you, makes perfect sense, I had not fully investigated the amps on each, I appreciate the info!
 
Used Fords Electric Spice H8. This paint matches the side gills and the badge. For some reason, the tow hooks are slightly different. Probably for durability since they’re tow hooks. But this paint looks pretty stock to everything else.

I used the 12oz spray can offered from the we site below.

When selecting it asks you for a clearcoat yes or no and 1k primer yes or no. Were both of those selections no?

Did it only take 1 12 oz can for all 4 calipers?

How many coats per caliper?

Thank you!
 
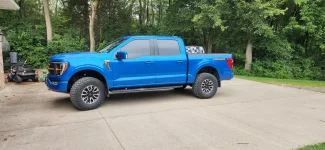
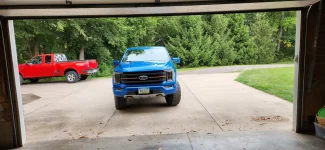
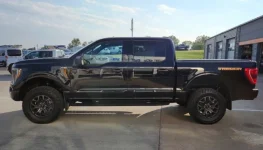
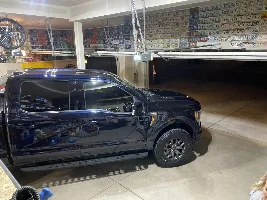
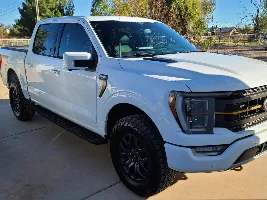
Installed my raptor 17s with 315-70 duratracs. Not sure I like the rims as much on this tuck as I did my 2012. The tires look good though.
 

Attachments

  • 20230919_114814.webp
    20230919_114814.webp
    322.7 KB · Views: 169
  • 20230919_115900.webp
    20230919_115900.webp
    287 KB · Views: 166
When selecting it asks you for a clearcoat yes or no and 1k primer yes or no. Were both of those selections no?

Did it only take 1 12 oz can for all 4 calipers?

How many coats per caliper?

Thank you!
I asked around. Most of the people I asked said no clear coat. It has the potential to yellow over time because of the heat from the brakes.

I completely used up my 12 oz can. Did 3 coats in front but could only do 2 on the rears. I wish I had gotten 2 because I would have used the paint on other things. In fact, I’m toying with the idea of doing my license plate holder.
 
I asked around. Most of the people I asked said no clear coat. It has the potential to yellow over time because of the heat from the brakes.

I completely used up my 12 oz can. Did 3 coats in front but could only do 2 on the rears. I wish I had gotten 2 because I would have used the paint on other things. In fact, I’m toying with the idea of doing my license plate holder.
I think ill get the 2 cans as well, thanks for the reply.
 
Used Fords Electric Spice H8. This paint matches the side gills and the badge. For some reason, the tow hooks are slightly different. Probably for durability since they’re tow hooks. But this paint looks pretty stock to everything else.

I used the 12oz spray can offered from the we site below.

I'd love to se the process you used for this...looks really cool. Do you expect them to be pretty durable?
 
The link keeps telling me "Oops we ran into some problems", check it when you can, thanks.
(Just pasted it here)
Happy to help.

I primed them with a grey rust-oleum primer I bought at Lowe’s. Did about 3 coats of primer. After dry, I did 2-3 coats of the “Ford Electric Spice H8”.

I only had a 12 oz can of the electric spice and I used it up completely. (So I was only able to do 2 coats on the rear) So it might be worth getting 2 12 oz cans. Or if you’re doing a different color a 15 oz can.

In the pics above, you see I used a plastic drop cloth. In the middle I tore a hole and slid it over the caliper. I did this AFTER taping off everything I wanted to protect. I used both paper and blue tape to ensure I properly covered everything I wanted.

This video is also a good watch to help learn the process.


Now there are some that will totally remove the caliper and paint them that way. But it’s a more involved process. But for me, this was an afternoon project that took about 3 hours and I didn’t have to mess with removing the calipers and reinstalling.

Feel free to ask more questions. I tried explaining everything but I realize I might have missed some things.
 

Attachments

  • IMG_6640.webp
    IMG_6640.webp
    267.6 KB · Views: 173
  • IMG_6641.webp
    IMG_6641.webp
    273.8 KB · Views: 172
  • IMG_6644.webp
    IMG_6644.webp
    371.9 KB · Views: 170
I'd love to se the process you used for this...looks really cool. Do you expect them to be pretty durable?
As durable as spray paint. My dad used to do this to his cars growing up. Last about 5 years or the life of your break pads. So when you have to replace your pads you can refresh the paint.

(Although, you have to be the type of person that cleans them on the regular to get brake dust off.)
 
(Just pasted it here)

Happy to help.

I primed them with a grey rust-oleum primer I bought at Lowe’s. Did about 3 coats of primer. After dry, I did 2-3 coats of the “Ford Electric Spice H8”.

I only had a 12 oz can of the electric spice and I used it up completely. (So I was only able to do 2 coats on the rear) So it might be worth getting 2 12 oz cans. Or if you’re doing a different color a 15 oz can.

In the pics above, you see I used a plastic drop cloth. In the middle I tore a hole and slid it over the caliper. I did this AFTER taping off everything I wanted to protect. I used both paper and blue tape to ensure I properly covered everything I wanted.

This video is also a good watch to help learn the process.


Now there are some that will totally remove the caliper and paint them that way. But it’s a more involved process. But for me, this was an afternoon project that took about 3 hours and I didn’t have to mess with removing the calipers and reinstalling.

Feel free to ask more questions. I tried explaining everything but I realize I might have missed some things.
Nice thanks for the details! Nice COTA Track map as well!
 
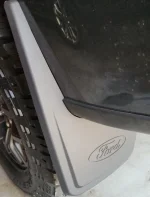
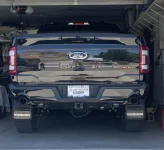
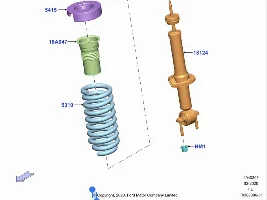
2.5" Rough Country struts installed. Husky rear inner wheel liners & Ford mudflaps installed.
 

Attachments

  • Screenshot_20230922_191418_Gallery.webp
    Screenshot_20230922_191418_Gallery.webp
    48.6 KB · Views: 167
  • Screenshot_20230922_191429_Gallery.webp
    Screenshot_20230922_191429_Gallery.webp
    43.9 KB · Views: 164
  • Screenshot_20230922_191446_Gallery.webp
    Screenshot_20230922_191446_Gallery.webp
    46.5 KB · Views: 169
Last edited:
Back
Top