Rabidtastic
Well-known member
- Joined
- Aug 8, 2022
- Messages
- 783
- Reaction score
- 791
- Location
- CFL
- Current Ride
- '22 AMB 402
- Current Ride #2
- '05 M3
How are you mounting the V1 to your (assuming builtright) cubby tray?
Velcro with double sided tape.How are you mounting the V1 to your (assuming builtright) cubby tray?
Nice job painting the cover!Here's the engine cover finished up. I didn't paint the black because it's a sponge like material and long term would be impossible to clean and maintain. I think the trims look good as an accent.
This cover is not plug and play, but I've read it can be adapted. I'm a little busy the next few weekends with work but hopefully in a couple of weeks I'll be able to post some more progress.
Bonus supervisor shot while he checks my QAQC
Nice job, I like the carbon fiber accents.Captains Log Day Two:
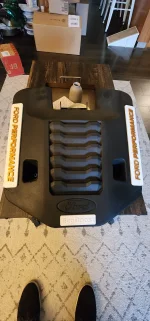
- started the day with an upgrade to the compressor, was totally impossible with a 6 gallon.
- then a lot of sanding, and painting, and tacking, and repeating.
- had to get creative with the duct tape so pieces wouldn't fly away with the spray gun.
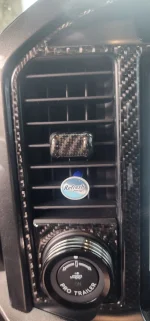
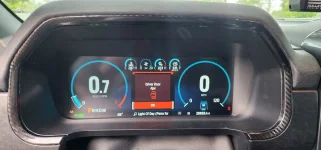
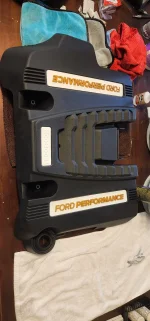
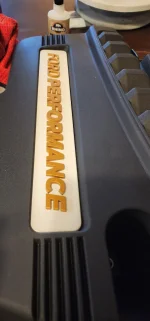
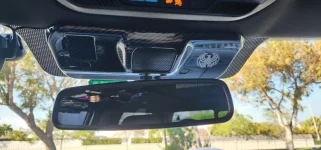
- decided to leave the interior pieces in carbon fiber because I realized it would be too much orange for my liking if I painted them. They are a nice subtle add now. Be careful if you get these, the odometer one and the sunglass one don't fit the tremor.
- clear coated everything and then started reassembly of the pieces. Overall not difficult, careful not to use too much glue.
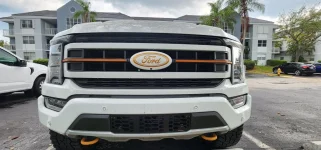
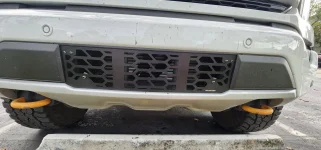
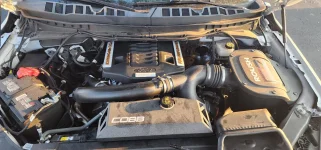
- then install on truck. I have to acetone some super glue off my paint carefully tomorrow at the rear emblem but overall easier to put back together than take apart initially to be honest. Patience is key.
- I'd say it's about 80-90% as good as professional done, for 1/3 of the price including buying the compressor.
- very doable if you halfway decently know how to paint, have the right tools, and figure out a space to do it in. Main hard part was being in an apartment, would've been cake in a garage. And I'd have less imperfections in the paint, though overall it looks good in my opinion.
Was a fun project, im happy with the results.
More to come!
Like, looks great ! But you failed to advise where you got the crab pantsGot the ignition button painted and on. I need a new lettering stamp for it. My homelander sticker was too big for it so i put it on the windshield speaker cover, came out as a nice subtle touch I think.
Ironically those are extra funny because my name is Sebastian. Brand is "lazy ones"... So comfortable.Like, looks great ! But you failed to advise where you got the crab pantsWhere did you get those pedal covers? Like them?
Thanks for the info!! will def have to take a look.Ironically those are extra funny because my name is Sebastian. Brand is "lazy ones"... So comfortable.
Pedals are from https://www.performancepedals.com/.
I like them a lot, way better than the stock plastic. They look significantly better also. A little pricey but they are the only ones i found that were made to fit and high quality. Someone else on this forum has them also, don't remember who it was.
I got the magnets but still waiting for the delivery of my Tremor. How did you attach the mount to the truck?Check out the magnetic mount systems for your weapon mount in the truck. I have one under the steering column on all my vehicles and love it. Won’t replace a safe for when you have to leave it in the truck but it’s fantastic when your driving around and don’t want it digging into your kidney or groin. Something like this, but there are a million of them out there.
![]()
Gun Magnet Mount and Holster for Car and Home | Magnetic Holster for Handgun, Rifle, Pistol, Revolver, Shotgun, Airsoft, Magazines, Accessories | Non-Scratch Rubber Coated 35 Lbs
✅PREMIUM QUALITY: holds up to 35 lbs, premium NON-SCRATCH rubber coated magnets, Many way's an places to put your magnet.✅WORKS WITH ALL HANDGUNS: No exclusion of guns. Holding up to 35. That means LARGE guns! Don't be afraid to buy a couple for larger firearms.✅GREAT FOR HOME AND VEHICLE...ghostconcealment.com
I just screwed it into the bottom of the steering column with the provided hardware. There was plenty of clearance for my mount location, but always check first! You could use 3m tape if you don’t want holes underneath the column.I got the magnets but still waiting for the delivery of my Tremor. How did you attach the mount to the truck?
Do these just slip over existing rubber or you remove oem and have to drill and screw on? ThanksIronically those are extra funny because my name is Sebastian. Brand is "lazy ones"... So comfortable.
Pedals are from https://www.performancepedals.com/.
I like them a lot, way better than the stock plastic. They look significantly better also. A little pricey but they are the only ones i found that were made to fit and high quality. Someone else on this forum has them also, don't remember who it was.
The second partDo these just slip over existing rubber or you remove oem and have to drill and screw on? Thanks
Check swarfworksHas anyone found any skid plates for the rear shock mounts? There's plenty for jeeps.